Perfect Tuna Salad without the Tuna

>> Friday, February 25, 2011


Do you like canned tuna? I used to love it. My mother would make the most wonderful tuna salad that I could eat by the bucket-fulls when I was younger, but the older I've become, the more and more I dislike canned tuna. Now, don't get me wrong, I LOVE fresh tuna: sushi, sashimi, seared, any way you can think of ... except for canned. Because I have such good memories of the tuna salad my mother made I always end up trying to recreate it and I always use canned tuna. However, I can't ever get it right and my confidence in my tuna salad-making abilities withers away. I've all but given up.

Tonight, I had a breakthrough! I made a wonderful salad perfect for toast, wraps, on crispy greens, on crackers, or any other way you can think of. The breakthrough you ask? Get rid of the tuna and replace it with chickpeas! Yes, you read that correctly... chickpeas. I love chickpeas and with the variety of ways they can be prepared I could probably eat them everyday and never get tired of them. This chickpea salad was so great! Light and a little bit unexpected, but creamy, satisfying, and perfect. This will from now on be my go-to salad for sandwiches. Sorry, canned tuna, I'm leaving you and not looking back.

Chickpea Salad
Makes 2 sandwiches, or 2 servings

1 15oz can chickpeas, drained and rinsed
1 very small onion, finely diced
1 small rib celery, diced
1/4 cup mayo
1 tablespoon yogurt
1 tablespoon grain mustard
handful of fresh cilantro, chopped
1 fat pinch of cayenne pepper
salt and pepper

Put the chickpeas in to a bowl and mash them. You can mash them as little or as much as you want (or, you could even put them in a food processor if you want them completely smooth). I mashed them about 'half way', keeping about 1/2 of the chickpeas whole.

Add the rest of the ingredients and mix everything well to combine. Season with salt and pepper.

I toasted a bit of wheat bread and piled up the salad to make a sandwich. It was fabulous!


I am so happy with this I could eat it tomorrow, and the day after, and the day after... no joke. I can't wait to have it again.

And don't be too upset over the breakup, canned tuna. My husband loves you and will definitely keep you around for a long-lasting relationship :)

Happy Eating!

Read more...

Fancy Quesadillas

>> Thursday, February 24, 2011


My husband has been gone for almost a week and I'm definitely ready for him to be back. He'll be back in a couple of days, so it isn't so bad, and while he's enjoying some absolutely wonderful, authentic Indian food, I made a pretty good dinner, myself. Tonight I cooked up a quick, easy, and light quesadilla with all sorts of delicious stuff inside. This really came about just because I really didn't feel like running down to the grocery store and I just gathered up what I had in the fridge and freezer. Don't you love when something you quickly put together without much thought ends up being great? I know I do, and this is what happened tonight! With the combination of flavors, this was an absolute treat and it didn't take any time to make at all. Try this out when you want a quick meal, or if your just trying to clean out the fridge and freezer :)

Shrimp, Balasamic Caramelized Onions, Arugula, and Goat Cheese Quesadillas
Serves 2

1 tablespoon olive oil
8 oz frozen shrimp, defrosted
1 tablespoon butter
1 medium red onion, sliced
1/2 teaspoon sugar
1 tablespoon balsamic vinegar
goat cheese, crumbled
arugula, washed and stalked trimmed off
4 small tortillas
salt and pepper
cherry tomatoes, quartered (optional)

First, start caramelizing the onions.

Slice the onions and get a heavy bottom skillet on medium high heat. Add the butter and once it's melted, add the onions.

Once the onions are in the pan, add the sugar and mix everything together. Turn the heat down to very low and allow the onions to cook on very low heat for 20 minutes.

Once the onions are very soft and start picking up some dark color, add the balsamic vinegar. Let the onions cook for an additional 10 minutes.

While the onions are cooking, put the defrosted shrimp into a bowl and add the olive oil and plenty of salt and pepper. Heat a skillet (preferably non-stick) over medium heat.

Once the skillet is hot, add the shrimp. Cook the shrimp on medium-high heat, turning once (about 7-10 minutes, total) until they are thoroughly cooked through. Remove the shrimp from the pan and turn the skillet down to low heat.

By this time, the onions should be finished. Turn off the heat. Now we're ready to put our quesadillas together!

I used the pan that I cooked the shrimp. Put a tortilla into the warm pan (keep it on low to medium-low heat).

Put some of the onions on the tortilla.

Add the arugula, shrimp and optional tomato to the tortilla.

Sprinkle the top with the crumbled goat's cheese.

Add the second tortilla on top and allow the quesadilla to cook on low heat for 2-3 minutes, or until the bottom tortilla becomes brown and the goat cheese becomes soft and creamy.

Carefully turn the quesadilla over and cook for an additional 2-3 minutes.

Move the quesadilla over to a plate and cut into 4 pieces. Serve immediately with a little raw arugula on the side.

The flavors in this were so good and really came together beautifully. The onions were soft a sweet, while the shrimp were firm, the goat cheese was creamy and tart, while the arugula was peppery and perfect. I loved how all of the elements came together with the tortillas. This was a great dinner, if I do say so myself (well, and there wasn't really anyone here to disagree...hehe). Try this out... they are fantastic!

Happy Eating!

Read more...

What being Foreign means to Me

>> Tuesday, February 22, 2011


Accommodate, adjust, 'getting used to', acclimate, and 'fitting in' are words and phrases that people use when they talk about moving somewhere different. I think these words really become meaningful and (sometimes) even daunting. There are so many new things I've experienced since moving here and I have to say I've used every, single one of these words and phrases to describe so many of these experiences.

Unfortunately, these words and phrases also imply that in some way I will always be a foreigner as long as I live here. To some, this might sound scary and unwelcoming, and I have to admit there were times when I first moved here that it was, in fact, scary and unwelcoming. Scary in the terms of simple, everyday things becoming large chores when learning a new language. Unwelcoming because the German culture is so different than American culture (especially the deep south), meaning that Germans are distant and cold when you first meet them, you may not get a 'Have a nice day' when finishing up some shopping, or just dealing with the fact that I now live in a city of 1.3 million people (it's easy to feel a bit lost).

It is amazing how time changes first impressions and feelings such as these. Yes, I will always be a foreigner here, but I've discovered that isn't a bad thing! I'm interesting to a lot of people, people want to talk and ask questions. People are accommodating (see? that word again!) to my dodgy German. I'm looking at cultures, experiences, and my life drastically different, and most importantly I've made wonderful, beautiful, interesting friends (they are open, genuine, trustworthy, funny, and loving). The bottom line is, I belong here and I'm having the time of my life! Because, when it is all said and done, foreigner or not, I belong here, I'm welcomed here, and this is my home. I wouldn't want to be anywhere else and I would not trade this experience for anything in the world.

From when I first moved here until today I've had a lot of ups and downs. I've wondered if it was really worth it, and I have even thought if going back to the US would be easier. I'm so glad that the moments of being down and unsure of myself were short-lived (VERY short lived) because I couldn't be happier.

So, I guess the point of all this is (yes, I had one) is that the words and phrases that describe being a foreigner are definitely accurate, but they are no longer relevant to me. I would rather say discovering, living, being, and 'totally, completely happy' are better words and phrases to describe me as a foreigner. I'm proud of who I am, where I'm from, and definitely where I am and where I'm going... being a foreigner is not a bad thing.

Encourage, love, and support each other... no matter where they are!

xoxo... 'The Foreigner' signing off... hehehe :)

Read more...

A Week Alone & 10 Minute Dinner

>> Sunday, February 20, 2011

My husband left yesterday for business and he'll be gone for a week. That means I'm left to my own devices in the cooking department! I have to say I cook a bit differently when my husband is away, meaning I usually cook things that take no time at all and I cook much lighter. My husband definitely never minds a salad or fruit for dinner, but that isn't something he would really like every day. I also take an opportunity to experiment in the kitchen when he is away because if something goes terribly wrong, I haven't ruined two servings worth of food, but I must say my disasters are becoming less and less.

Tonight, I can sum up the way that I felt about cooking by one phrase: I couldn't be bothered. Sorry, I just couldn't. I didn't want to spend all day or all evening in the kitchen, but I wanted something warm, comforting, and not too heavy. I made this in less than 10 minutes and it was exactly what I wanted. I made a wonderful gnocchi dish that was flavored with lemon, parsley, and spring onions. I used pre-made gnocchi for this dish and it was totally worth it. Making gnocchi is time consuming and for my quick meal and lack of motivation, the pre-made gnocchi was the perfect solution. Because pre-made gnocchi can be a bit bland and end up being soggy when you cook them, I fried them in a pan. They turned out with a brown, crispy outside that provided that extra flavor and the inside was soft and warm, just like they should be. The lemon, parsley, and spring onions gave everything a wonderful flavor and with the addition of fresh tomato and grated Parmesan cheese, it rounded out dish to perfection. When you're low on time, or motivation, try this out. You'll love it.

Lemon & Parsley Gnocchi
Serves 1 as a main (can easily be doubled)

1/2 tablespoon butter
1/2 tablespoon olive oil
8oz pre-made gnocchi
1 large spring onion, chopped
3 vine tomatoes, quartered
1 large handful parsley, chopped
juice of 1 lemon
1 tablespoon freshly grated Parmesan, plus more for garnish
salt and pepper

Get all of the ingredients together and heat the butter and oil in a heavy bottomed pan over medium-high heat.

Put the gnocchi in the pan and make sure the gnocchi are in one layer in the pan. Season with salt and pepper. Leave them here and don't turn them for 3 minutes. You want them to become brown. Once they turn brown, turn the heat down to medium-low and turn them over. Cook for an additional 2 minutes.

While the gnocchi are cooking, chop the spring onions, parsley, quarter the tomatoes, and grate the cheese.

Put the lemon, parsley, and Parmesan into a bowl. Mix completely.

Once the gnocchi are browned on both sides, add the spring onion and tomatoes. Turn off the heat at this point and let the onions and tomatoes cook from the residual heat for 2 minutes.

Once the onions tomatoes have slightly softened, add the mixture to the bowl with the parsley, lemon, and Parmesan. Mix everything completely and taste. Adjust the seasoning if necessary.

Pour the gnocchi into a bowl and garnish with a bit of extra Parmesan.

How is that for easy and fast? I have to say I was so happy (and a bit surprised) with how well this turned out and I have to say that cooking the gnocchi in a pan is so much better than just boiling them, especially when you're using pre-made gnocchi. I hope you try this out the next time you want something quick. And, by the way, this will definitely be on the menu the next time I'm dining alone.

Happy Eating!

Read more...

Easy, Quick Homemade Curry!

>> Tuesday, February 15, 2011


I little while ago I posted about our favorite Indian restaurant in Munich. We like to go as much as possible, but when we don't feel like getting out, but want a curry, I just make a curry! When you look at a recipe for an Indian dish, the ingredients and the steps can look quite daunting, but this recipe shouldn't make anyone nervous. It is quick, easy, and perfect to throw together on a weeknight. I'm not claiming that this dish is authentic Indian. All I know is my husband and I love it.

There are 3 parts to this meal: the curry, rice, and a cooling yogurt sauce. What's great about this recipe is that you can change or add just about anything and make it your own. If you like curry or you've never had curry, try this recipe. I promise you won't be disappointed.

Shrimp Tikka Massala
Serves 2 generously

For the rice:
1 cup Basmati rice
1/2 tablespoon butter
1/2 teaspoon salt
1/2 tablespoon Turmeric
1/2 cup frozen peas

For the yogurt dipping sauce:
1/4 cup plain yogurt
1/4 cup sour cream
1/4 teaspoon salt
1 1/2 tablespoon lemon juice
2 teaspoons chopped fresh cilantro (coriander)
1 teaspoon olive oil

For the Tikka Massala:
8 oz shrimp (frozen is fine), defrosted and patted dry with a paper towel
1/4 cup plain yogurt
1/2 teaspoon ground coriander
1/2 teaspoon ground cumin
1 tablespoon butter
1 medium onion
4 cloves garlic
1-2" piece fresh ginger, outer layer removed and finely grated
2-3 tablespoons minced fresh chili, depending on taste (optional)
1 1/2 tablespoons garam massala
1/2 teaspoon curry powder
15oz can of diced tomatoes
1/4 cup water
1/4 cup half and half
2-3 tablespoons lemon juice
handful of fresh cilantro, chopped
salt

The first thing I like to do is get the rice prepared for cooking so I can put it on the stove as soon as I'm ready.

Place all of the ingredients for the rice, except the peas, into a small saucepan with a lid. Set aside.

Then, prepare the cooling yogurt sauce. Combine all of the ingredients of the sauce and set aside. I like to leave this deconstructed. I think it is beautiful this way and people can mix up the sauce at the table.

Now, to start on the curry!

Place the yogurt, cumin, ground coriander, and a fat pinch of salt in a small mixing bowl.

Add the shrimp to the yogurt and mix everything thoroughly.

Get a stove top griddle and turn it on high heat. Place the shrimp on the griddle and leave them on one side without turning them until the coating starts to char. At this point turn the shrimp and char on the other side. The time will depend on how large your shrimp are. Just make sure the shrimp are cooked through without drying them out.

Once the shrimp are finished, remove them from the pan onto a paper towel and set aside. Don't be afraid of this char. The taste is rich and not at all a burnt flavor (I wouldn't lie... I'm extremely sensitive to burnt flavors and hate them... this char is perfect. Trust me!)

To start the sauce, chop the onion and garlic and grate the ginger. I used a red and yellow onion because I had two tiny onions instead of one medium one.

Heat the tablespoon of butter in a large, heavy-bottomed skillet over medium-high heat. Once the butter is melted add the onion.
Once the onion is translucent (about 5-8 minutes), add the garlic and ginger and cook for about two minutes. While this is cooking, chop up the chilies if you're using them.

Add the chilies, garam massala, curry powder, and a pinch of salt. Stir everything around for about 1 minute.

Add the tomatoes and water. Make sure you scrape the bottom of the pan while adding the tomatoes and water to deglaze the pan. Bring everything to a boil, then turn it down and simmer for 10-15 minutes, allowing the sauce to thicken.

Put the saucepan with the rice on medium-high heat and cooked, covered for 15-20 minutes.

After the sauce has simmered and thickened, add the cream, lemon juice, and shrimp to the sauce. Combine everything and simmer for an additional 5-10 minutes, until the sauce is the consistency you like. Right before serving add the chopped cilantro and adjust the seasoning if necessary.

When the rice is finished, turn of the heat and add the frozen peas. Stir everything around. The residual heat will cook the peas to perfection.

I moved the rice to these lovely wooden bowls. I love the color of the rice in contrast with the peas. The flavor is just as beautiful.

I put the curry into a bowl so we could take what we wanted at the table.

This was so good. It was spicy but lighter than a regular curry. The rice was soft and fluffy and that yogurt sauce was to die for. By the way, don't tell anyone, but I warmed up some flour tortillas to act as a bit of Naan bread to soak up every drop of curry. I know this is blasphemy to some, but it worked just fine for us and if you want to do the same, by all means... Your secret is safe with me ;)

Give this curry a try. You'll love it as much as we did!

Happy Eating!

Read more...

What a Wonderful Weekend

>> Sunday, February 13, 2011

My husband is fantastic. He's so sweet and he gave me a wonderful surprise this weekend. He surprised me with tickets to the ballet! Munich is such a cultural city and I had been mentioning how nice it would be to dress up and go to an opera, play, or ballet. I had only mentioned this in passing and he got tickets for us. We went on Friday, and there is one word to describe how it was: magical! We saw Sleeping Beauty (which is my absolute favorite fairy tale) and I think throughout the entire performance I had goosebumps. It was moving, funny, and just perfect. It was a perfect! I really can't thank him enough for such a beautiful, thoughtful gift.

As usual, Sunday was our lazy day and the day I cook something that takes a little bit of time (I know I've mentioned this before). Tonight I roasted a chicken! I love this recipe and I've made it countless times. I stuff the chicken with a lemon, thyme, and bacon stuffing. Then, the last 30 minutes of the cooking time I throw in some veggies to roast alongside the chicken. I always think that when I make a meal and my husband and I are too busy eating and enjoying to barely speak. The only sounds at the dinner table tonight were 'Mmmmm' and 'Yum' and 'Ooooo'. You get the picture.

Try this recipe.... you'll have a dinner table full of loved ones too busy enjoying this meal to say much of anything.

Roasted Chicken with Stuffing and Veggies
Serves 2 generously (you can double the stuffing and veggies for a larger bird)

1 whole chicken for roasting, about 2 lbs
2 tablespoons butter, divided
2 tablespoons vegetable oil, divided
4 slices bacon, chopped into one inch pieces
1 small red onion, diced
2 cloves garlic, minced
1 tablespoon fresh thyme, minced
3 tablespoons chopped parsley
5 slices white bread, cut into 1/2" pieces
zest of one lemon
juice of 3 lemons, divided
1 egg
plenty of salt and pepper
flour (amount depends on the amount of drippings from the chicken after roasting)
water
vegetables for roasting, chopped into 1" pieces (I used red bell pepper and broccoli, but you can use any vegetables that are good for roasting)

First, prepare the stuffing.

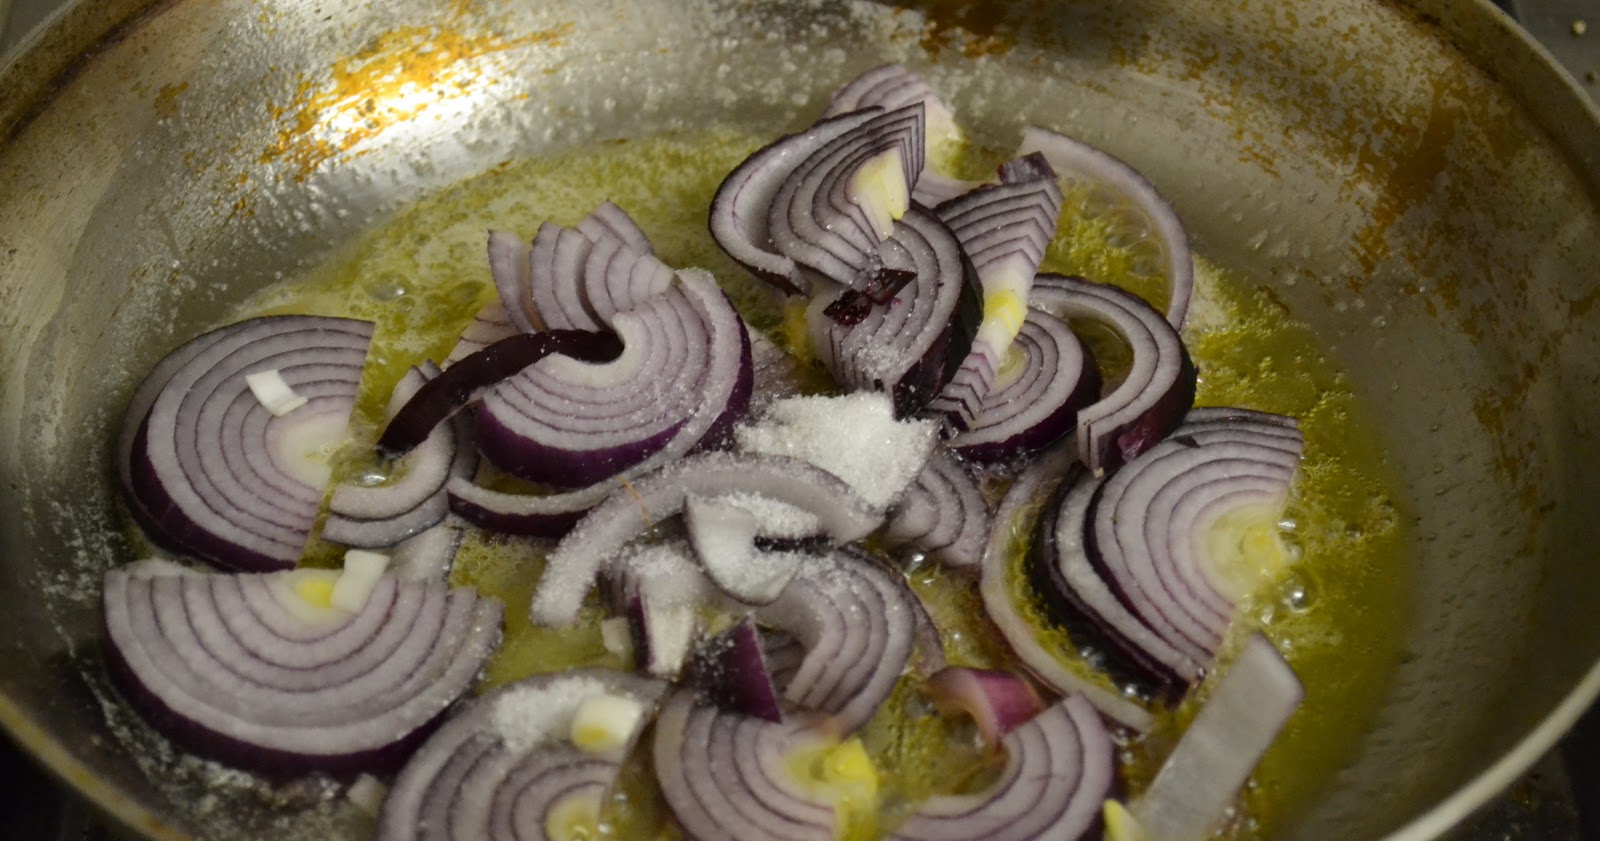
First, chop the garlic, onion, bacon, and thyme. Heat a skillet over medium heat and add 1 tablespoon of butter and 1 tablespoon of oil to the pan.

Once the butter has melted add the bacon to the pan. Cook over medium heat until the bacon is cooked. I like to keep the bacon a bit soft (I'm not a huge fan of crispy bacon).

Once the the bacon is cooked, remove the bacon with a slotted spoon and drain on a paper towel. Don't discard the fat. Heat the pan back up to medium heat and add the onion. Cook until the onion is translucent, about 5-7 minutes.

Once the onion is translucent, add the garlic and thyme. Cook until the garlic becomes fragrant, about 2 minutes.

Add the bacon back to the pan and cook for 2 more minutes. After two minutes are up, remove the skillet from the heat and set aside.

Get out a large mixing bowl and the bread.

Chop the bread into pieces. I like having stuffing with large pieces of bread. If you want smaller pieces, you can chop them finer or even use a food processor to have finely ground bread.

Add the bread, parsley, lemon zest, juice of 1 lemon, and egg into the mixing bowl. Do not throw away the lemon, once you've removed the rind and juice. Cut the lemon into 8 pieces.

Add the bacon mixture to the bowl.

Mix everything thoroughly and set aside while you prepare the chicken.

Pre-heat the oven to 375F.

Prepare the chicken by washing it under cold water (of course, if your chicken has giblets, remove these and discard them). Pat the chicken as dry as possible both inside and outside. Place the chicken into a deep roasting pan.

Season the outside of the chicken with plenty of salt and pepper. Start stuffing the cavity of the chicken with the stuffing.

Once the chicken is stuffed, take a piece of butcher's twine and tie the legs together.

Now, separate the skin on top of the breasts from the breast meat by pushing a finger between the skin and the meat.

Take 1 tablespoon of butter and cut it into two pieces.

Place each piece of butter underneath the skin.

Place the lemon pieces around the chicken and place the chicken into the oven. Depending on the weight of your chicken will depend on the time it will take to roast the chicken. A general rule is 20 minutes per pound, plus 15 minutes.

While the chicken is roasting, chop up the veggies you want to add to the roasting pan. I used broccoli and red bell pepper, but you could use any vegetables you want. Put the vegetables in a bowl, add 1 tablespoon of oil, and plenty of salt and pepper. Mix everything, making sure the veggies are coated in oil.

When the chicken has 30 more minutes in the oven, remove the roasting pan from the oven and add the vegetables around the chicken. Put the pan back into the oven and cook until the chicken is completely cooked through completely. You know the chicken is cooked once pierced, the juices run clear.
Remove the pan from the oven and squeeze the remaining lemon juice over the chicken and vegetables. Turn off the oven and place the chicken back into the oven for 5 minutes.

After roasting, remove the pan from the oven and move the chicken from the pan to a clean platter and cover with foil, allowing the chicken to rest for 5-10 minutes.

Remove the vegetables from the pan with a slotted spoon, leaving all of the drippings in the roasting pan.

Heat the pan of drippings on the stove top over medium heat. Add a bit of flour (depending on the amount of drippings from the chicken). I usually use a 1:1 drippings to flour ratio. Whisk the flour into the drippings, making sure it doesn't clump. Add water, 1/2 cup at a time, whisking constantly, until the gravy is the consistency you like. Pour the gravy into a dish to serve.

After the chicken has rested, remove the stuffing with a spoon. Take out all of the stuffing... you don't want to lose one bit of this... it is magic!

Carve the chicken and place it on a serving platter.

Beautiful! It's juicy and tender. The skin is the brown and crispy, which accompanies the chicken fantastically.

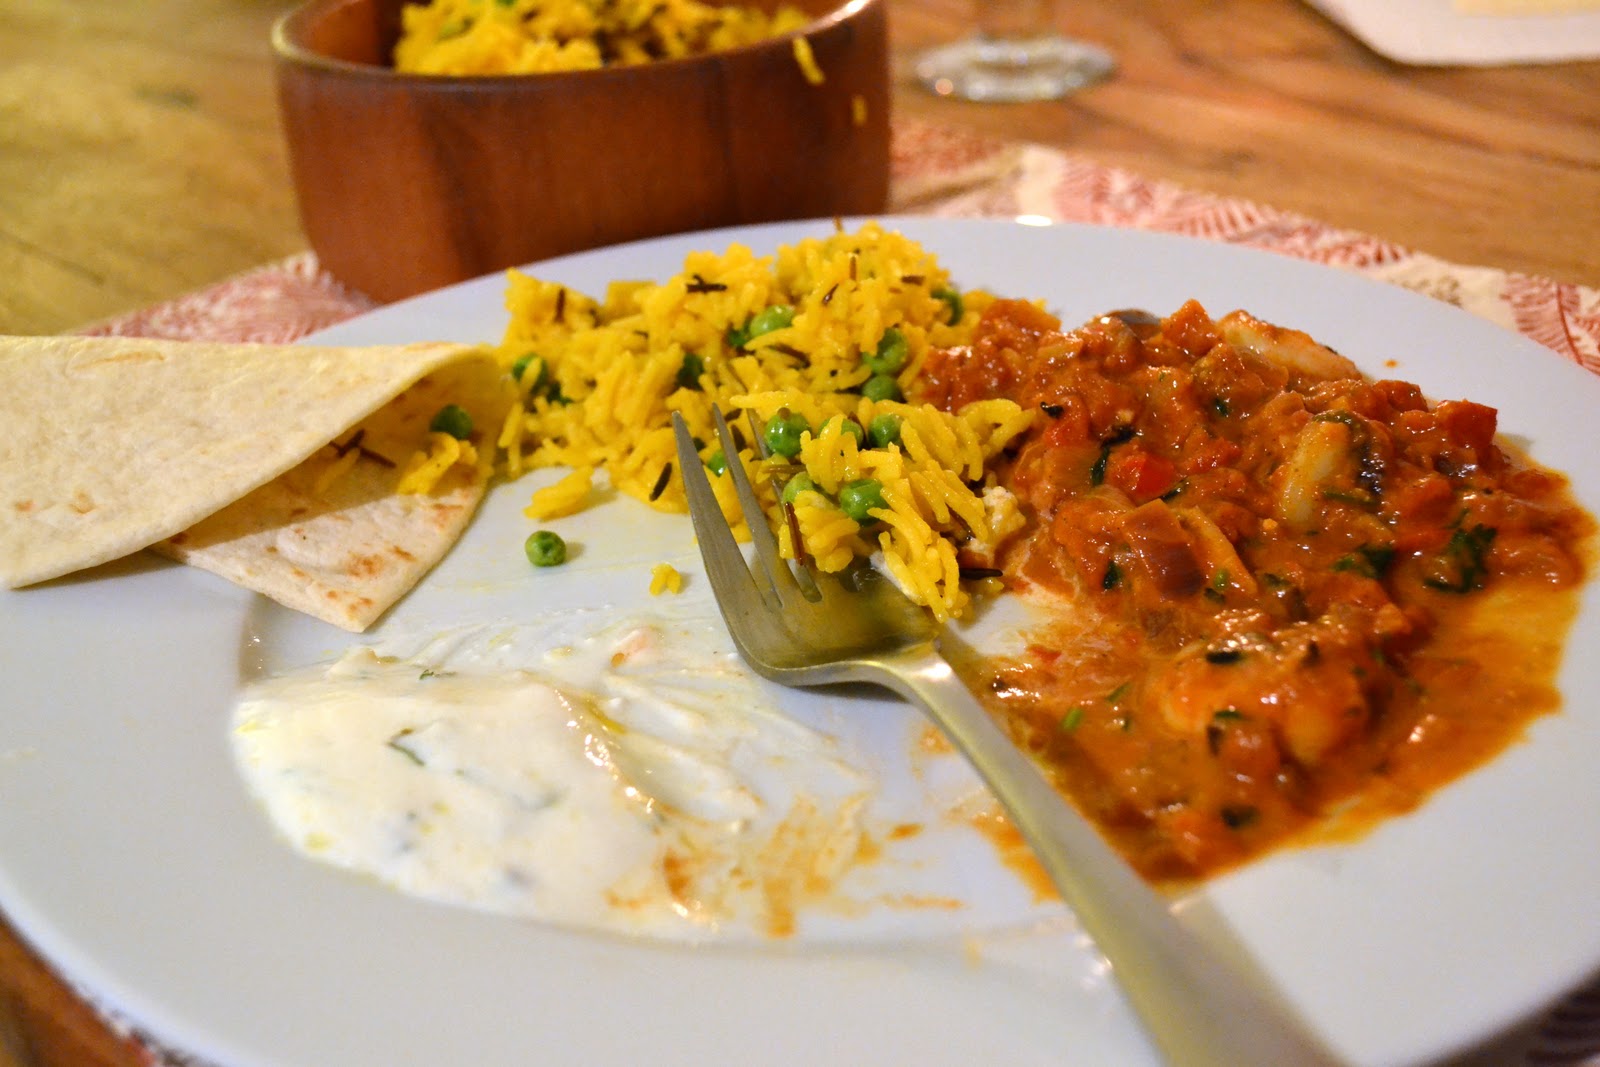
We took everything to the table and served ourselves.

Have everyone dig in and watch the silence ensue... It's fabulous!

Happy Eating!

Read more...

  © Blogger template Simple n' Sweet by Ourblogtemplates.com 2009

Back to TOP